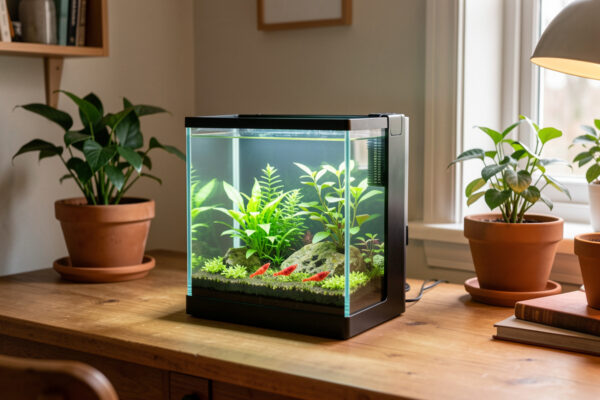
The best nano tank kit for most people is a rimless all-in-one in the 5 to 10 gallon range with a rear filter chamber and a real LED — the Fluval Flex 9 and Spec 5 sit at the top of my list because they solve the two things beginners get wrong: they hide the filter and they force enough water volume to buy you a margin for error. A kit is not a shortcut past the chemistry. It just packages the hardware.
I need to say the quiet part first, because the whole industry is built on hiding it: a small tank is harder than a big one, not easier. Twenty litres of water swings faster than two hundred. Ammonia climbs quicker, temperature drifts overnight, and a single overfeed can spike nitrite in a way a 55-gallon would shrug off. I learned this the same way I learned hydroponics — by logging numbers until the pattern was undeniable. So when I rank a “kit,” I am not asking which box looks nicest on the shelf. I am asking which package gives you the most forgiving volume, the least fiddly filter, and the fewest reasons to panic-buy gadgets in week three.
This is the hub for everything I have written about buying a complete small tank — the brand head-to-heads, the size decisions, the glass, and the honest case for buying used. If you already know your goal (shrimp, a planted scape, one betta), skip to my shortlist by goal. If you are starting cold, read straight through. Either way, the census of nano advice online covers filters and heaters and lights as separate purchases and almost never tells you how to buy the whole thing at once. That gap is what this cluster fills.
What Counts as a Nano Tank Kit, and What Doesn’t?
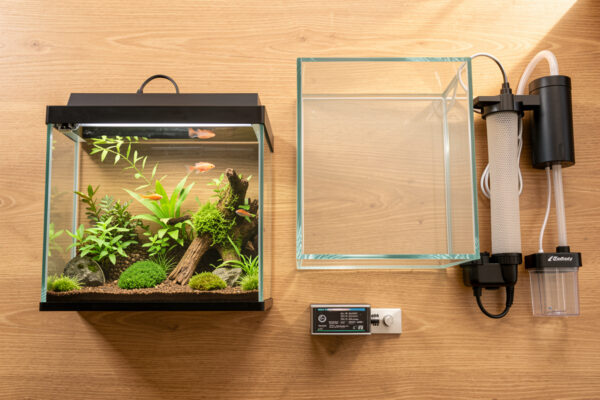
A nano tank kit is a tank sold with its core life support built in or bundled: the aquarium, a filter (usually integrated), a light, and often a heater or lid. The useful dividing line is integration. An all-in-one hides the filter in a rear or corner chamber; a “combo” just shrink-wraps a separate hang-on-back filter to a bare tank. Both get called kits. They are not the same purchase.
Nano itself is a loose term, but the working definition I use in my parameter log is anything under about 40 litres (roughly 10 gallons). Below that, the volume math turns unforgiving fast — I cover exactly why in the volume math on small tanks. Above 40 litres you are into standard-tank territory where the water does more of the babysitting for you.
What doesn’t count as a kit worth buying: the sub-2-gallon “desktop” bowls and cubes with a trickle filter and no heater. I keep a spare pico bench precisely so I can test these honestly, and the verdict is consistent — they are an expert’s stunt, not a starter. A 1.5-gallon cube with a betta in an unheated Swedish flat is a temperature graph that looks like a saw blade. The fish pays for that.
So the real kit market, the part worth your money, lives between roughly 5 and 20 litres for shrimp and 20 to 40 litres for a first fish tank. Everything below is about choosing inside that band.
Are All-in-One Kits Actually Better for Beginners?
For most first-timers, yes — a good all-in-one is better, because the single worst-looking part of a nano is the equipment, and an all-in-one hides it. A rear chamber holds the filter media, heater, and return pump out of sight, which means you are far less tempted to rip it all out and start meddling. Fewer visible cables, fewer decisions, more stability.
But “better” has a cost and a ceiling, and I lay the whole trade-off out in all-in-one tank vs buying components separately. The short version: an all-in-one is more forgiving and tidier, but you pay a premium for the integration, the stock pump is often weak, and when a part dies you are hunting for a proprietary cartridge instead of a $12 sponge. I have swapped the stock filter floss in my Spec-class tank for my own media stack because the factory cartridge is a nitrate factory disguised as convenience.

Buying components separately wins when you have a specific plan — a shrimp tank that wants a bare sponge filter and nothing else, or an aquascape where you refuse to look at a black plastic box. If that is you, read the rimless route below. If you just want a tank that works and looks clean on a desk, the all-in-one is the honest recommendation.
What Size Nano Kit Should You Actually Start With?
Start bigger than your instinct says. If you are torn between 5 and 10 gallons, take the 10. The extra water is not a luxury — it is the single cheapest stability upgrade you can buy, and it costs maybe fifteen dollars more at the kit level. A 10-gallon holds temperature through a cold night and dilutes a feeding mistake that would spike a 5-gallon.
That said, 5 gallons has a real place: a dedicated shrimp colony, a single betta done right, or a desk where 10 gallons simply will not fit. I keep my low-tech reference tank in that Spec-class ~20-litre range and it has been stable for years, so I am not going to pretend 5 gallons can’t work. It just has less margin. My full breakdowns live in the best 5-gallon kits worth buying and the best 10-gallon tanks for a first real nano.
Here is the volume math I keep coming back to. A single well-fed cherry shrimp colony pushes very little bioload, so 5 gallons is genuinely fine. One betta is borderline in 5 and comfortable in 10. A small school of six chili rasboras wants 10 gallons minimum for the swimming room and the dilution — the stocking side of that is in my nano tank stocking guide. Match the tank to the animal’s needs, not to your shelf.
Fluval Spec vs Flex vs the Rimless Route
The three real paths in this market are: the Fluval Spec (a small rimless-ish all-in-one), the Fluval Flex (a larger curved-front all-in-one with a better pump), and the open rimless aquascaping tank you equip yourself. Each is a genuinely different philosophy, not just a size step.
The Spec is the tidy desk tank — 5 gallons, a slim rear chamber, a decent stock light. The Flex is the “I want plants and maybe a betta” tank — 9 or 15 gallons, more chamber room, a stronger return, and a remote-controlled LED. Fluval’s own spec sheet for the Flex 9 rates the pump at 61 GPH and the light at 1900 lumens / 7500K — numbers worth knowing before you assume the stock gear is weak. I compare them chamber-by-chamber, pump-by-pump in Fluval Spec vs Flex, because the honest answer depends entirely on whether you want a shrimp jar or a planted display.
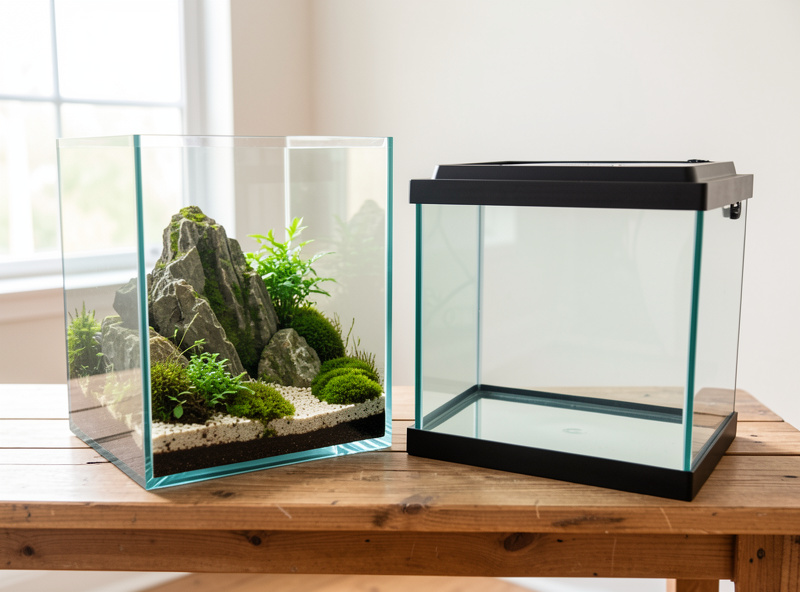
The rimless route is the third door. You buy a low-iron open-top tank — a UNS or ADA-style cube or rectangle — and add your own filter, light, and heater. It is the most expensive and the most rewarding, and it is the only way to get that seamless, brace-free front pane. My high-tech 60-litre showpiece is built this way. Whether it beats a kit for you is a real question I answer in rimless aquascaping tank vs an all-in-one kit.
How the main nano kit paths compare
| Path | Typical volume | Filter type | Best for | Street price (tank+core) | Main drawback |
|---|---|---|---|---|---|
| Fluval Spec 5 | 19 L (5 gal) | Integrated rear chamber | Shrimp, desk planted | $90 to $110 | Weak stock pump, cramped chamber |
| Fluval Flex 9 | 34 L (9 gal) | Integrated 3-stage chamber | Planted, one betta | $120 to $150 | Curved front distorts, price |
| Rimless cube + own gear | 20 to 60 L | Your choice (HOB, canister, sponge) | Aquascaping, high-tech | $140 to $300+ | You source everything; costliest |
| Generic 10-gal combo | 38 L (10 gal) | Bundled hang-on-back | Budget first tank | $45 to $70 | Visible HOB, weak light, no lid |
| Pico bowl/cube | 3 to 7 L | Trickle/tiny internal | Experienced keepers only | $25 to $50 | Wild swings; not a starter |
Prices are rough 2026 street figures and move around; treat them as ratios, not quotes. The pattern that matters holds: integration and glass quality cost money, and the cheapest combo saves you cash by giving you the ugliest, weakest hardware.
Cube or Rectangle? The Footprint That Decides Stocking
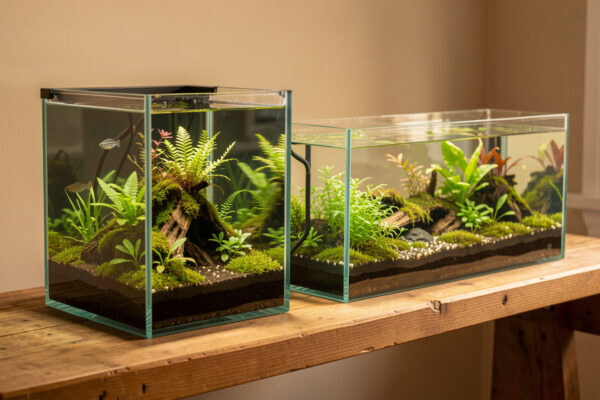
Shape is not cosmetic. A cube and a rectangle of the same volume behave differently because what stocks a tank is surface area and swimming length, not litres. A 30-litre rectangle gives fish more horizontal lane and more oxygen-exchanging surface than a 30-litre cube, which piles the water tall and narrow.
Cubes are aquascaper’s tanks — they frame a single central hardscape beautifully and photograph like a diorama. Rectangles are keeper’s tanks — better for a small school, easier to light evenly, more surface for gas exchange. I keep both shapes on the rack and the trade-offs are real enough that I gave them their own piece: cube vs rectangle nano and the shape trade-offs. If you want fish, lean rectangle. If you want a scape, the cube earns its keep.
Does Low-Iron Glass Matter on Something This Small?
On a small tank, low-iron glass matters more than on a big one, not less — because you are looking through a short water column where the green tint of ordinary glass has nowhere to hide. Standard float glass carries iron that throws a green cast on the edges; low-iron (often sold as “clear” or “diamant”) strips that out, so plant greens and shrimp reds read true.
Whether that clarity is worth the roughly 30 to 50 percent price premium depends on what the tank is for. On my aquascaped showpiece, absolutely — the whole point is the view. On a shrimp grow-out or a quarantine tank, it is money better spent on an RO unit or a decent light. I walk through exactly when the upgrade pays off in is low-iron glass worth it on a small tank. It is the most over-recommended upgrade in the hobby and occasionally the most worth it.
The Filter, Heater, and Light: What Kits Get Right and Wrong
Kits get the tank right and the electronics half-right. The filter in an all-in-one is usually adequate in flow but stuffed with a proprietary cartridge that is really just a slow nitrate release you pay a subscription for. The first upgrade I make on any kit is to bin the cartridge and pack the chamber with my own sponge and biomedia — the reasoning is in my nano tank filtration guide.
The heater is where kits cut the most corners, and it is the one component I never trust on the dial. A stuck heater in 20 litres cooks a tank in an afternoon. I verify every heater against an external thermometer and I explain why in heater reliability on small tanks. If your kit ships without a heater and you keep anything tropical, that is a non-negotiable separate buy.
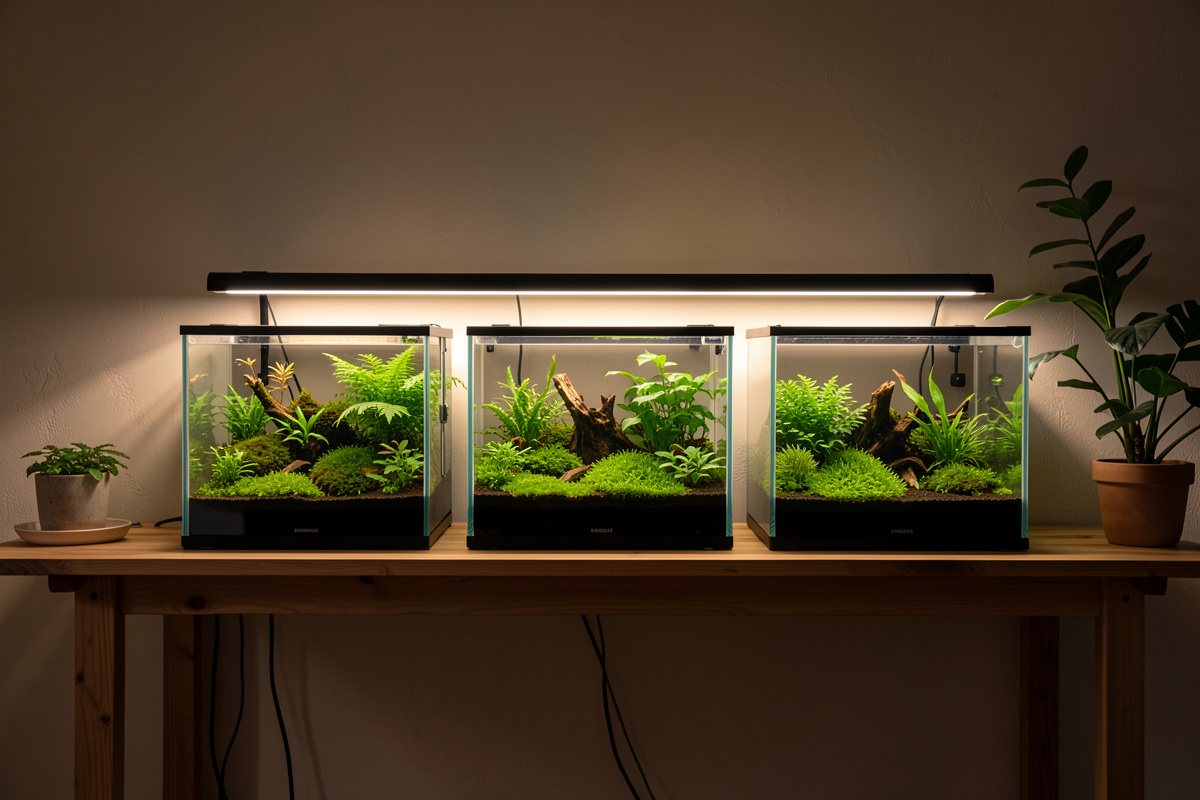
Stock lights range from useless to genuinely good. The Flex LED grows low-light plants fine; most generic combo lights do not. If plants are the plan, budget for a real light — I rank the options in the best LED light for a nano planted tank and cover the cheap-but-decent tier in the budget nano light guide. And one more component the kits never include but you will want: an auto top-off earns its place fast on small water where evaporation moves your parameters daily.
Should You Buy New or Used?
A used tank can be the best value in the hobby or a slow leak waiting to flood your floor, and telling the two apart is a skill. I buy used regularly — my shrimp tank glass came secondhand — but I inspect it like a mechanic checks a car. Silicone condition, brace integrity, scratch depth on the viewing pane, and a mandatory leak test before it goes anywhere near livestock.
The savings are real: a used rimless can be half the price of new, and glass does not wear out the way electronics do. But a tank that has been sitting empty for two years has silicone that may have let go, and a hairline scratch becomes a stress fracture under a full water load. My complete walkthrough — the exact checklist I run in a stranger’s garage before I hand over cash — is in buying a used nano tank: my inspection checklist. Used electronics I am far warier of; a used tank, inspected properly, is smart money.
My Actual Buying Shortlist by Goal
Forget the “best overall” framing. The right kit is a function of what will live in it. Here is what I would actually buy today for each of the three most common nano goals, with the setup guide for each.
For a shrimp colony: a 5-gallon all-in-one (Spec-class) or a bare rimless with a sponge filter. Shrimp want stable parameters far more than swimming room, so volume matters less and water discipline matters most — RO plus remineralization, logged KH and GH. Start with the Neocaridina care guide and the cherry shrimp parameter targets. A cheap glass box with clean water beats an expensive kit with careless water every time.
For a planted display: a Fluval Flex 9 or a rimless cube with a real light and good substrate. Plants forgive a lot if the light and the substrate are right — I use an active soil and cover the choice in the planted substrate guide, with a specific verdict in my Fluval Stratum review. The overall build sits in the low-tech planted nano guide, and if you want to go pressurized, the high-tech CO2 guide.
For one betta: a 5-gallon minimum, 10 if you have the space, always heated. A betta in a proper setup is a wonderful nano subject and a betta in a bowl is a welfare failure — I do not soften that. The honest build is in the betta nano setup guide, and the underlying stability principles that make any of these tanks survivable are in why small water is the advanced class.
Whatever you choose, buy the test kit before you buy the fancy light. A $15 liquid test kit and the discipline to use it will save more livestock than $150 of gadgets bought in a week-three panic. The tank is just the box. The chemistry is the hobby.
As an Amazon Associate I earn from qualifying purchases. If you want to browse the categories I have been describing, these searches land you in the right aisle: all-in-one nano aquarium kits, liquid test kits, and nano aquarium heaters. Buy the water tools first.
How Much Should a Good Nano Kit Really Cost?
Budget for the whole system, not the box on the shelf. The tank is the cheap part. A realistic all-in-lands-in-your-house cost for a 10-gallon planted nano runs $180 to $260 once you have added the things the kit forgot — a reliable heater, a test kit, a dechlorinator, substrate, and a light good enough to grow plants. The tank might be $70 of that. People blow the budget on the wrong third of it every time.
Here is how I would split roughly $220 for a first planted 10-gallon, and it is deliberately unglamorous. Tank and integrated filter: $70. A heater I actually trust plus an external thermometer: $30. Liquid test kit: $18. Substrate — an active soil or an inert base with root tabs: $35. Light, if the stock one is weak: $45. Dechlorinator, and the boring consumables: $22. Notice the light and substrate together outweigh the tank. That is correct. The tank holds water; the light and substrate decide whether anything grows.
The recurring cost of a nano is genuinely low — a few dollars a month in dechlorinator and the odd filter sponge — which is one of the real joys of small water. But the proprietary-cartridge trap I mentioned earlier is a slow tax: buying a $6 branded cartridge every month for a chamber you could pack with a $4 sponge that lasts a year is $70 a year gone. I stopped feeding that machine years ago. Total cost of ownership, not sticker price, is the number to compare across kits.
The Nano Kit Mistakes I Paid For
My first small tank was a 6-litre pico bowl, bought because it was cute and cheap, and it taught me the single most expensive lesson in the hobby: small volume punishes carelessness fast. No heater, an unheated Swedish flat, and a temperature that swung from 19 to 24 degrees between night and afternoon sun. Nothing I put in it thrived. I keep that spare pico bench now specifically so I can test and warn honestly — it was never a starter tank, it was an advanced tank sold as a beginner one.
The second mistake was trusting a heater dial. On my early shrimp attempt a cheap 25-watt heater stuck on in about 25 litres, and by the time I noticed the tank was at 30 degrees the colony had stopped moving. I lost molting shrimp to a stuck relay I could have caught with a $4 external thermometer. Since then I never trust the dial — the whole argument is in the heater reliability piece — and I verify every heater against a second reading. That failure is why I say heaters are the one component I will not cheap out on.
The third was buying for looks. I once picked a curved-front combo because it photographed well and spent months fighting the distortion and a stock light that couldn’t grow anything more demanding than a plastic plant. The lesson: buy the tank for the water and the animal, then make it pretty. A kit that solves the chemistry ugly beats a kit that looks stunning and fights you. I would rather log clean parameters through plain glass than admire a green-tinted mess.
The Buying Sequence I’d Follow Today
If I were starting over with what I know now, I would buy in this order, and the order is the point. First, decide the inhabitant — shrimp, betta, or a small school — because that sets the minimum volume and the whole rest of the list follows the animal, not the aesthetics. My stocking guide is the honest place to settle that before you spend a krona.
Second, pick the size one step up from your instinct and choose all-in-one versus rimless from the trade-offs in the components comparison. Third, buy the water tools — test kit, dechlorinator, and a heater you trust — before the tank ships, so you are ready to start a fishless cycle the day it arrives. Fourth, cycle the tank properly; nothing living goes in until the numbers say so, and the fishless cycle walkthrough is the exact process I still use — dose ammonia to the 2 to 3 ppm window DrTim’s Aquatics documents and never let it climb past 5 ppm, or you stall the nitrite-eaters for weeks. Only fifth do you add livestock, slowly, testing as you go.
That sequence — animal, tank, water tools, cycle, livestock — is the difference between a stable first nano and the dead tank that ends the hobby for so many people in month two. The kit is step two of five. Do not let the shopping cart convince you it is the whole job.
What is the best nano tank kit for a beginner?
A rimless all-in-one in the 5 to 10 gallon range, like the Fluval Spec 5 or Flex 9. They hide the filter, give enough water volume for stability, and ship with a usable LED. Buy the 10 gallon if you can fit it, since the extra water is the cheapest stability upgrade you can get.
Are all-in-one nano kits better than buying parts separately?
For most beginners, yes. An all-in-one hides the equipment in a rear chamber and is tidier and more forgiving. Buying separately wins only when you have a specific plan, such as a shrimp tank on a bare sponge filter or an aquascape where you refuse to see a plastic filter box.
Is 5 gallons or 10 gallons better for a first nano tank?
Ten gallons is more forgiving because the larger water volume holds temperature overnight and dilutes feeding mistakes. Five gallons works well for a dedicated shrimp colony or a single betta, but it has less margin for error. If you are unsure, take the 10 gallon.
Do I need low-iron glass on a small tank?
It matters more on a small tank than a large one because you view through a short water column where ordinary glass shows a green tint. It is worth the 30 to 50 percent premium on an aquascaped display tank, but not on a shrimp grow-out or quarantine tank where the money is better spent on water tools.
Is it safe to buy a used nano aquarium?
Yes, if you inspect it properly. Glass does not wear out, so a used tank can be half the price of new. Check the silicone seams, brace condition, and scratch depth on the viewing pane, and always run a leak test before adding livestock. Be far more cautious with used electronics than used glass.
Keep Building
Work through the whole kit-buying cluster from here:
- Fluval Spec vs Flex: Which Nano Kit Fits Your Plan
- All-in-One Tank vs Buying Components Separately
- Rimless Aquascaping Tank vs an All-in-One Kit
- Best 5-Gallon Aquarium Kits Worth Buying
- Best 10-Gallon Tanks for a First Real Nano
- Cube vs Rectangle Nano: The Shape Trade-Offs
- Is Low-Iron Glass Worth It on a Small Tank?
- Buying a Used Nano Tank: My Inspection Checklist